Axir Wallet Social Recovery Guide
Enabling Social Recovery
Social recovery is a powerful security feature of the AXR Wallet that allows you to regain access to your funds if you lose your private keys. By designating trusted individuals or entities as guardians, you create a safety net for your digital assets.
Step 1: Access the Social Recovery Settings
Navigate to your AXR Wallet dashboard. Look for the "Social Recovery" section, which typically includes a toggle switch to enable this feature.
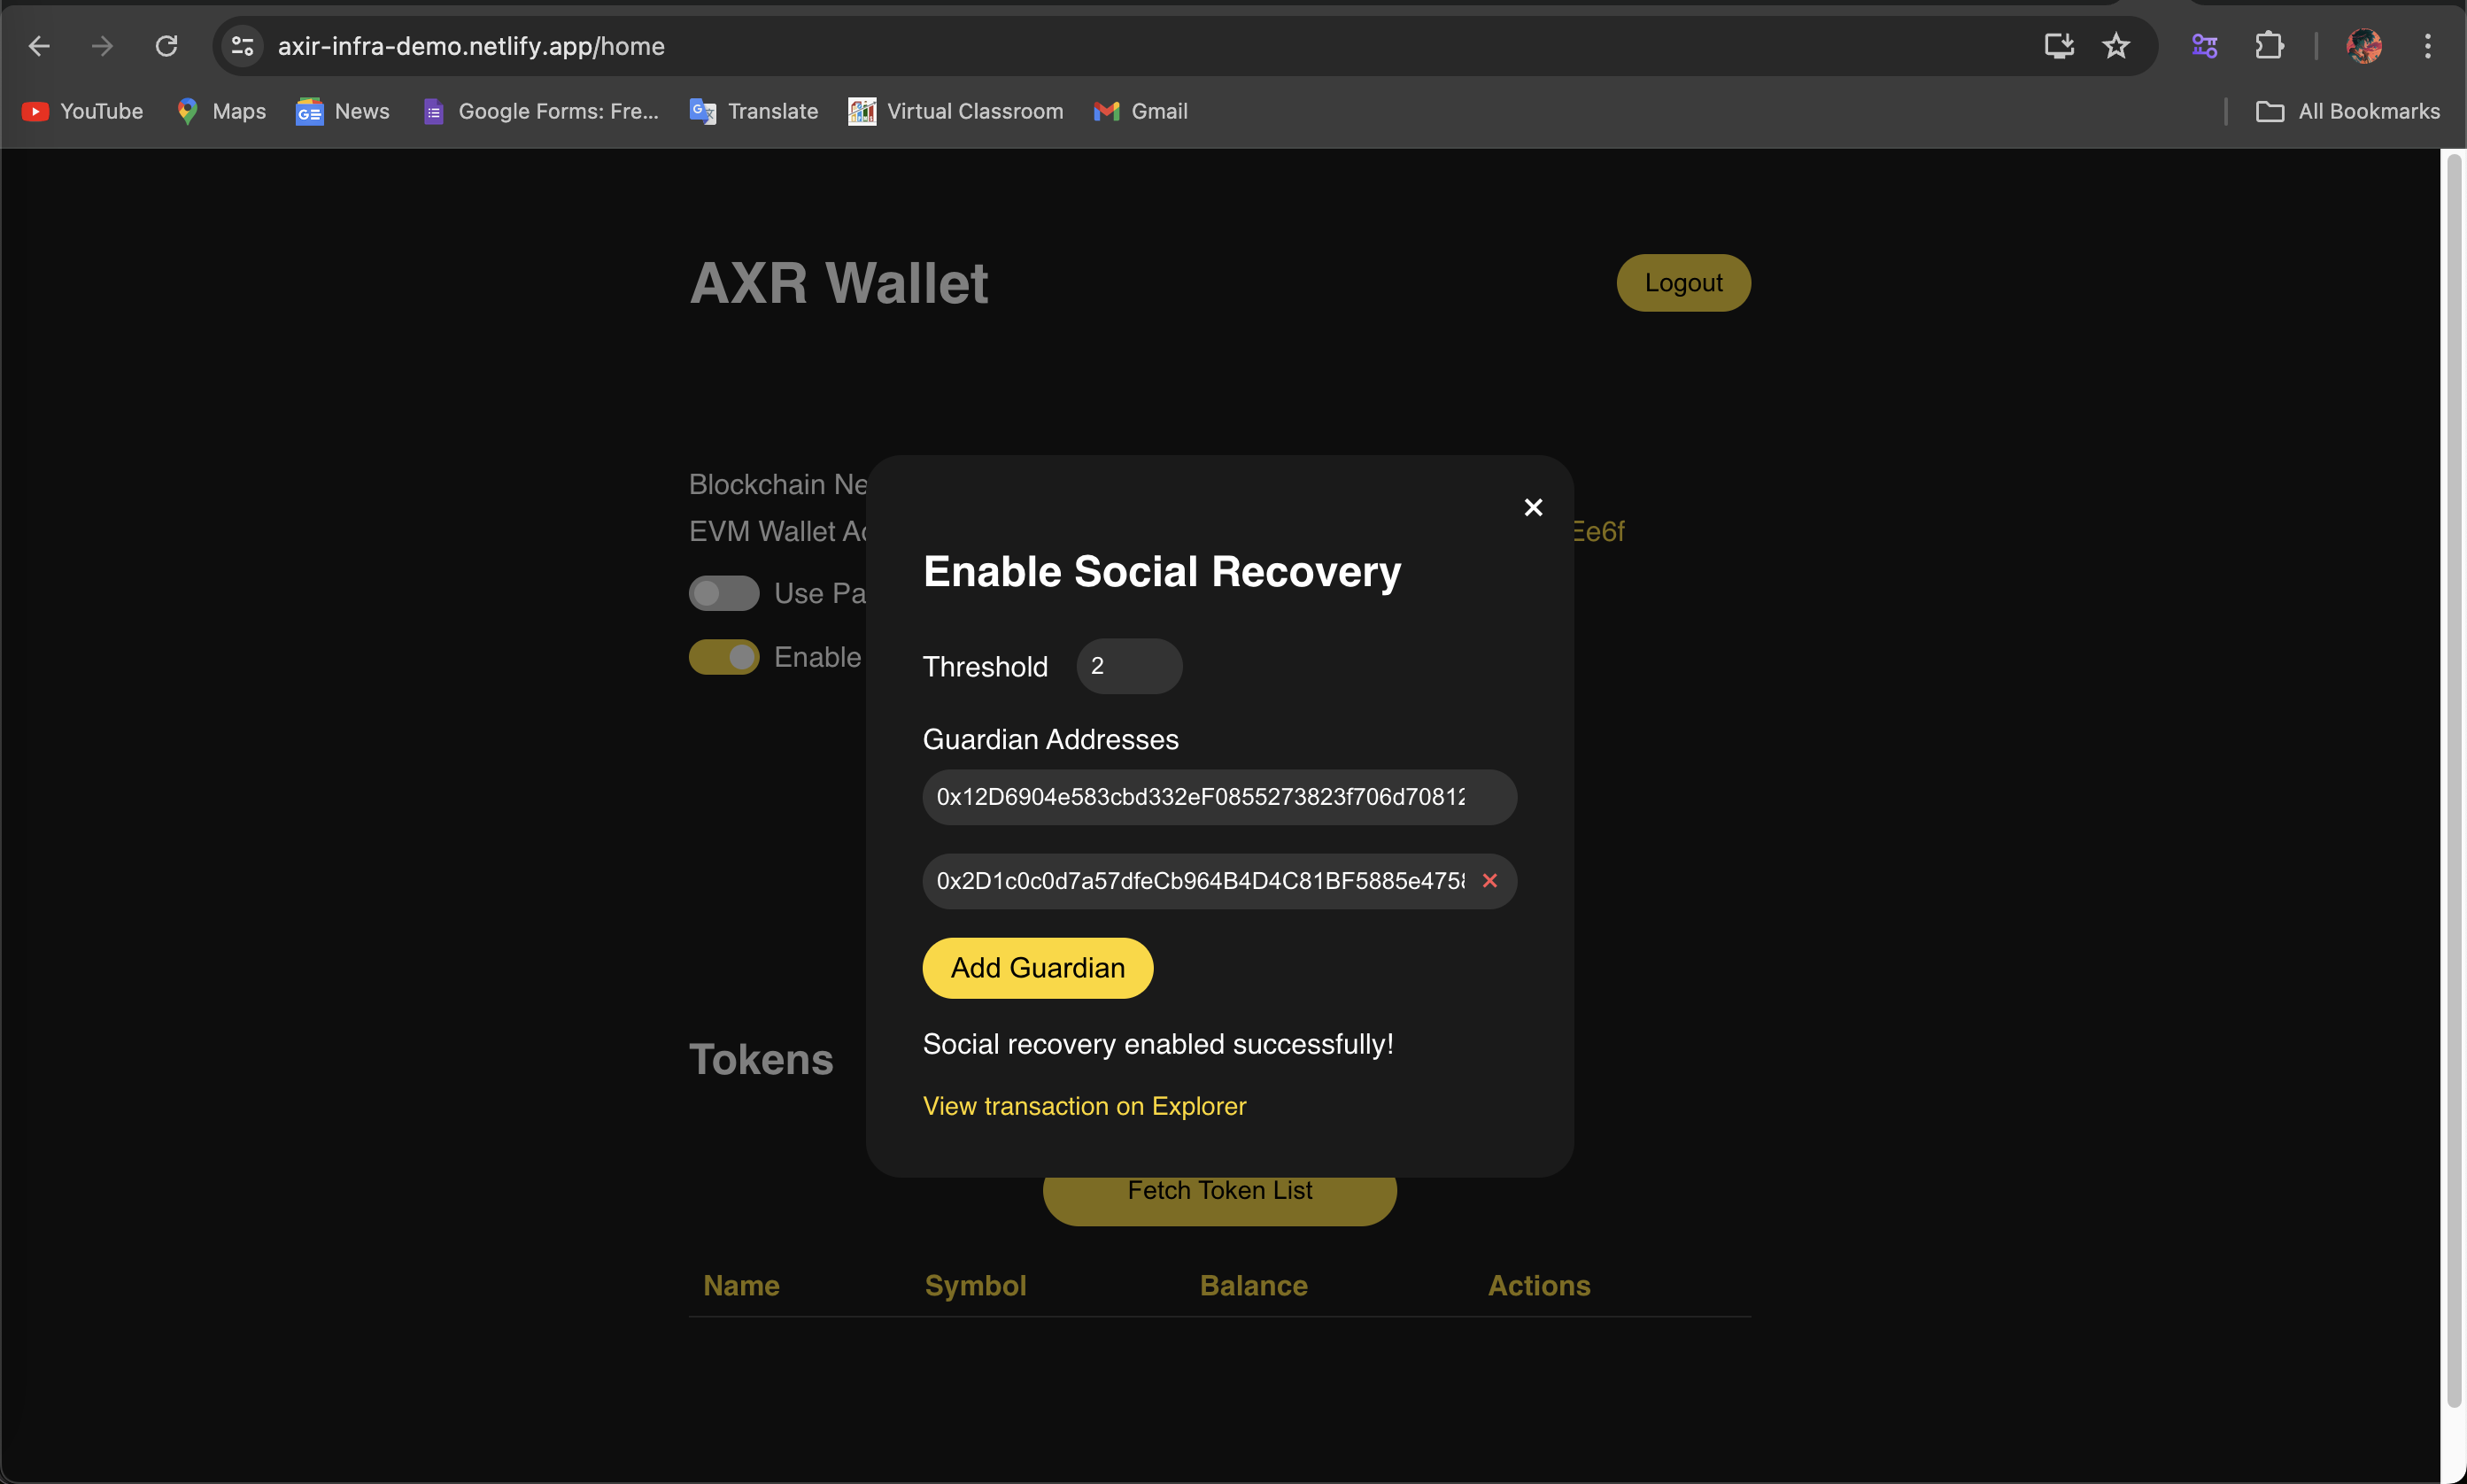
Step 2: Set Guardian Threshold
Once you've enabled social recovery, you'll need to set the number of guardians required to initiate a wallet recovery. This is called the threshold. For example, if you set the threshold to 2, it means any two of your designated guardians must agree and sign to recover your wallet.
Step 3: Add Guardian Addresses
Enter the Ethereum addresses of your chosen guardians. These should be individuals or entities you trust completely, as they will have the power to help recover your wallet.
Step 4: Confirm and Enable
After adding your guardians and setting the threshold, confirm your choices and enable social recovery. You'll likely need to sign a transaction to finalize this setup.
Once completed, you should see a confirmation message indicating that social recovery has been successfully enabled.
Initiating Wallet Recovery
If you find yourself in a situation where you need to recover your wallet, perhaps due to lost keys or a compromised device, here's how to start the process:
Step 1: Create Recovery Hash
Navigate to the "Create Hash" section of the recovery interface.
- Enter your AXR Wallet address in the designated field.
- Provide the new owner address - this is the address that will gain control of the wallet after recovery.
- Click the "Generate Hash" button to create a unique recovery hash.
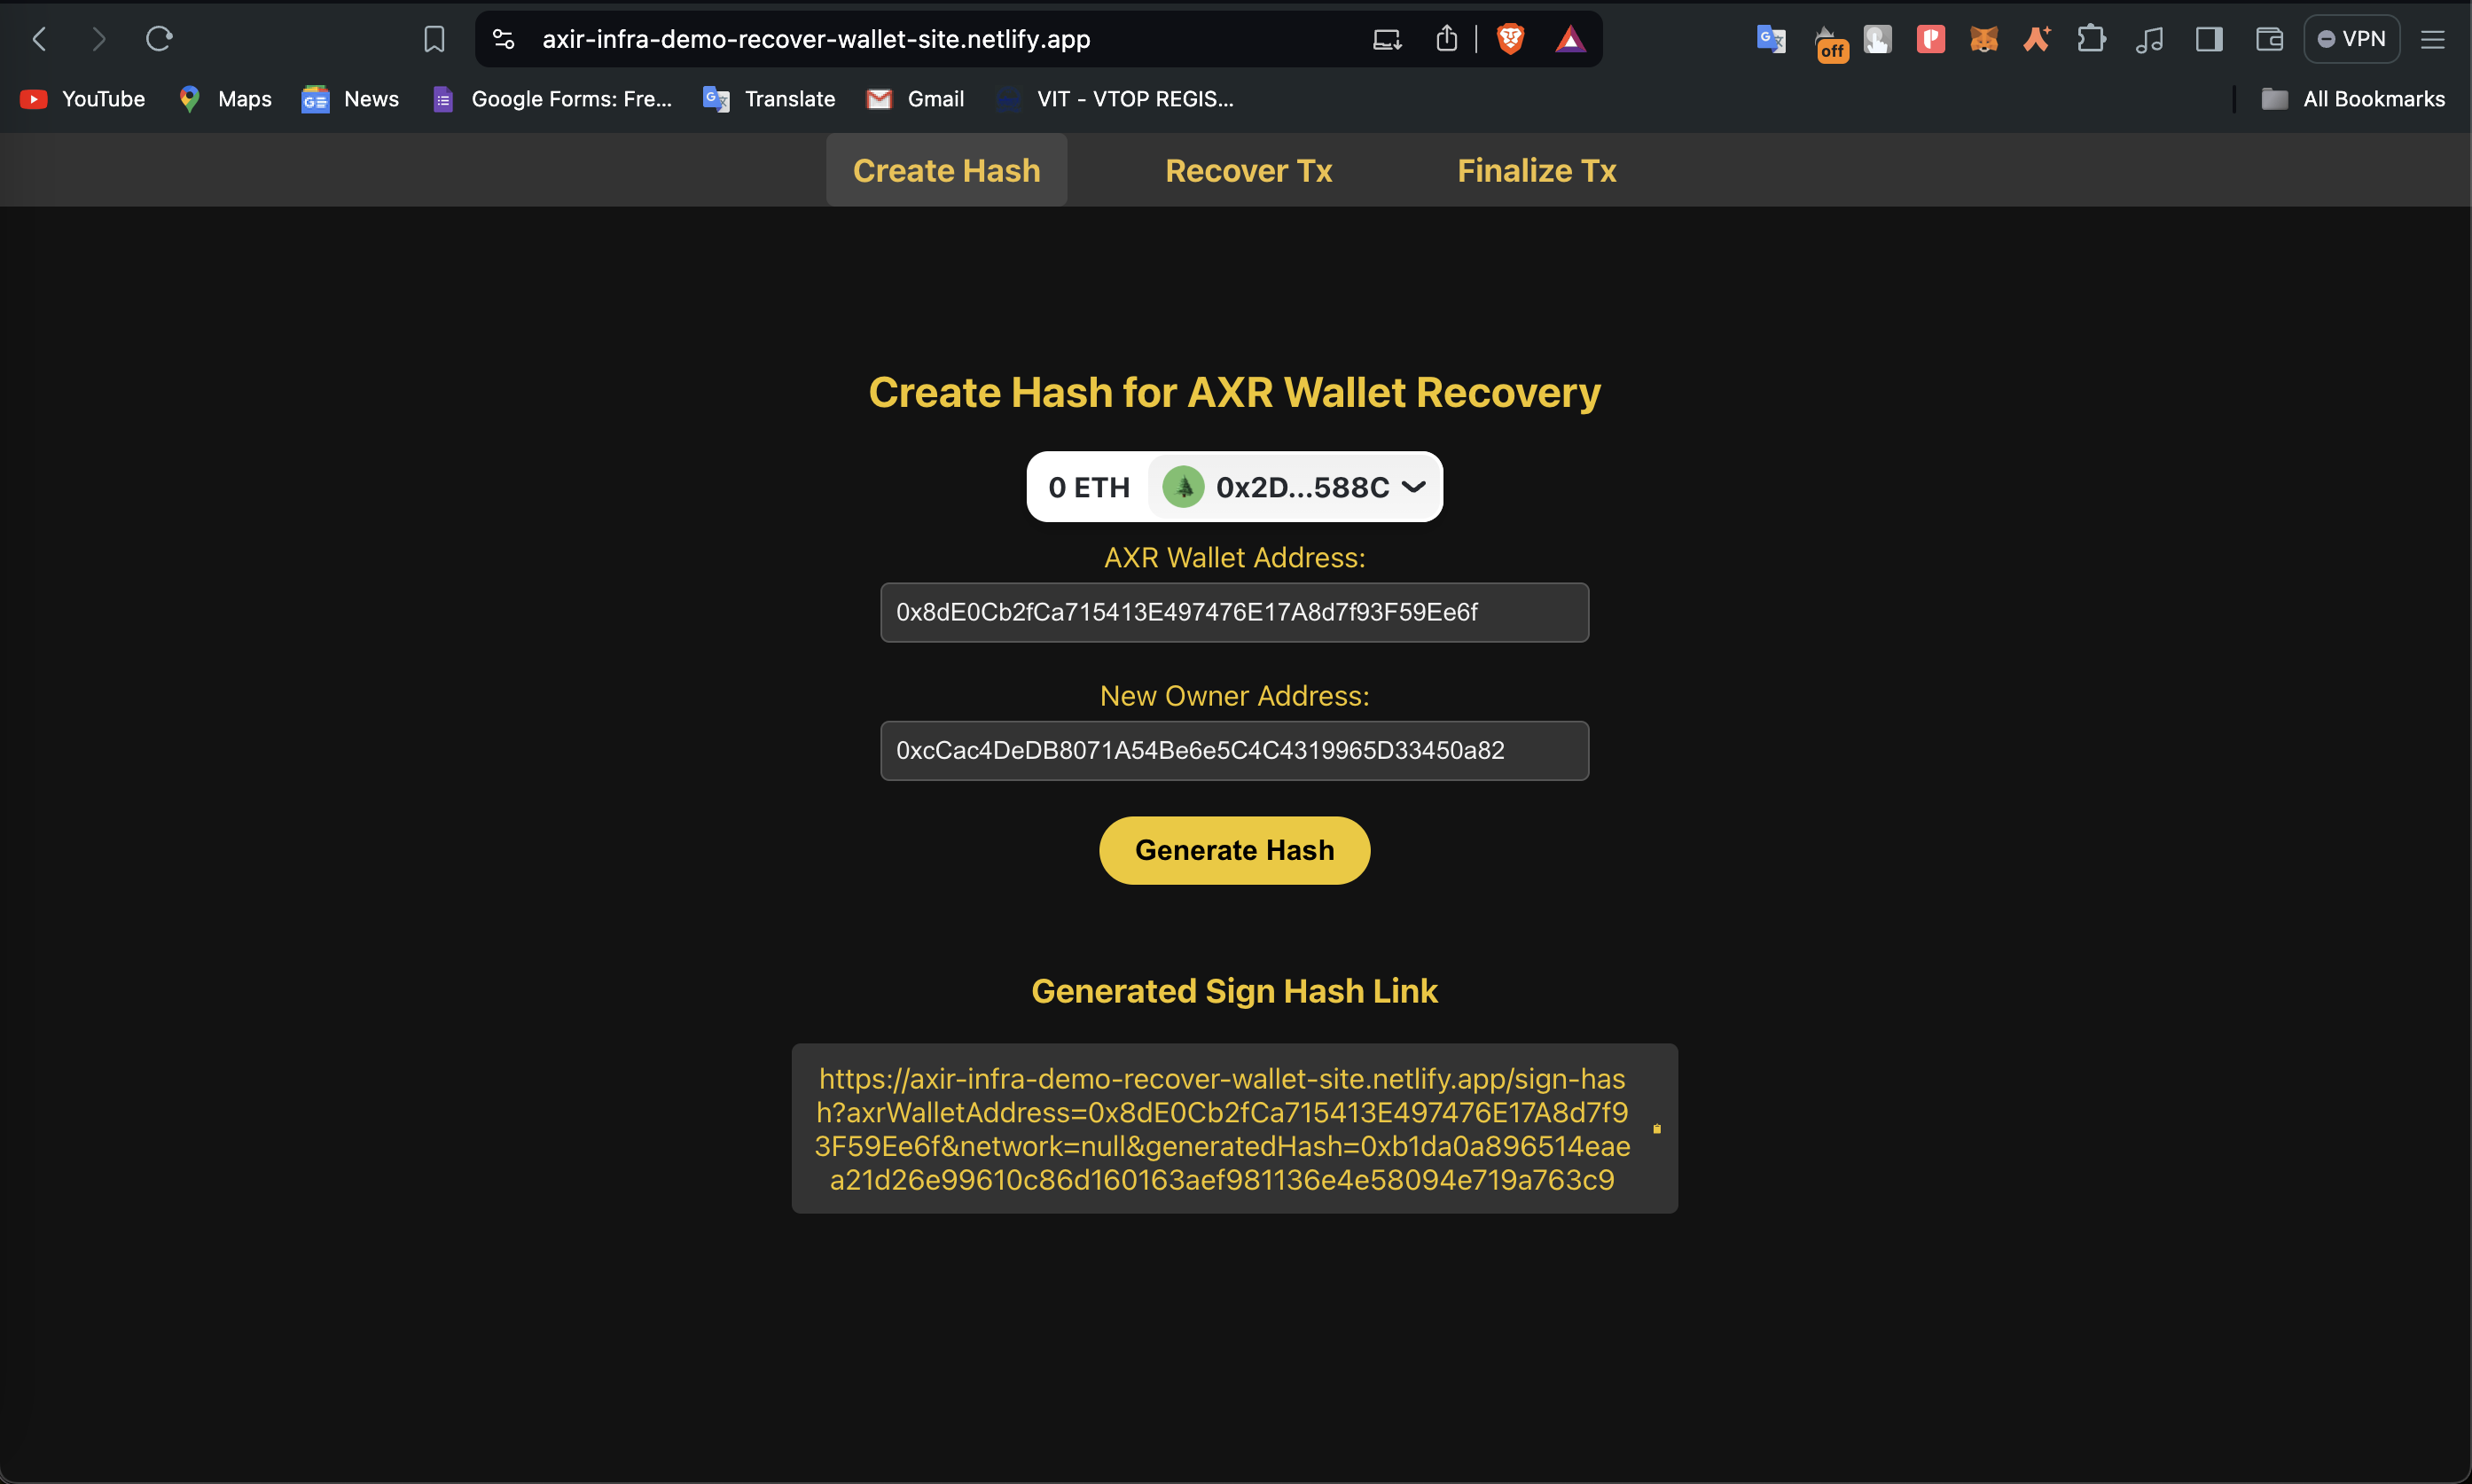
Step 2: Collect Guardian Signatures
The generated hash needs to be signed by your guardians. Share this hash with them securely using the link generated above, and they will need to sign it using their Ethereum wallets.
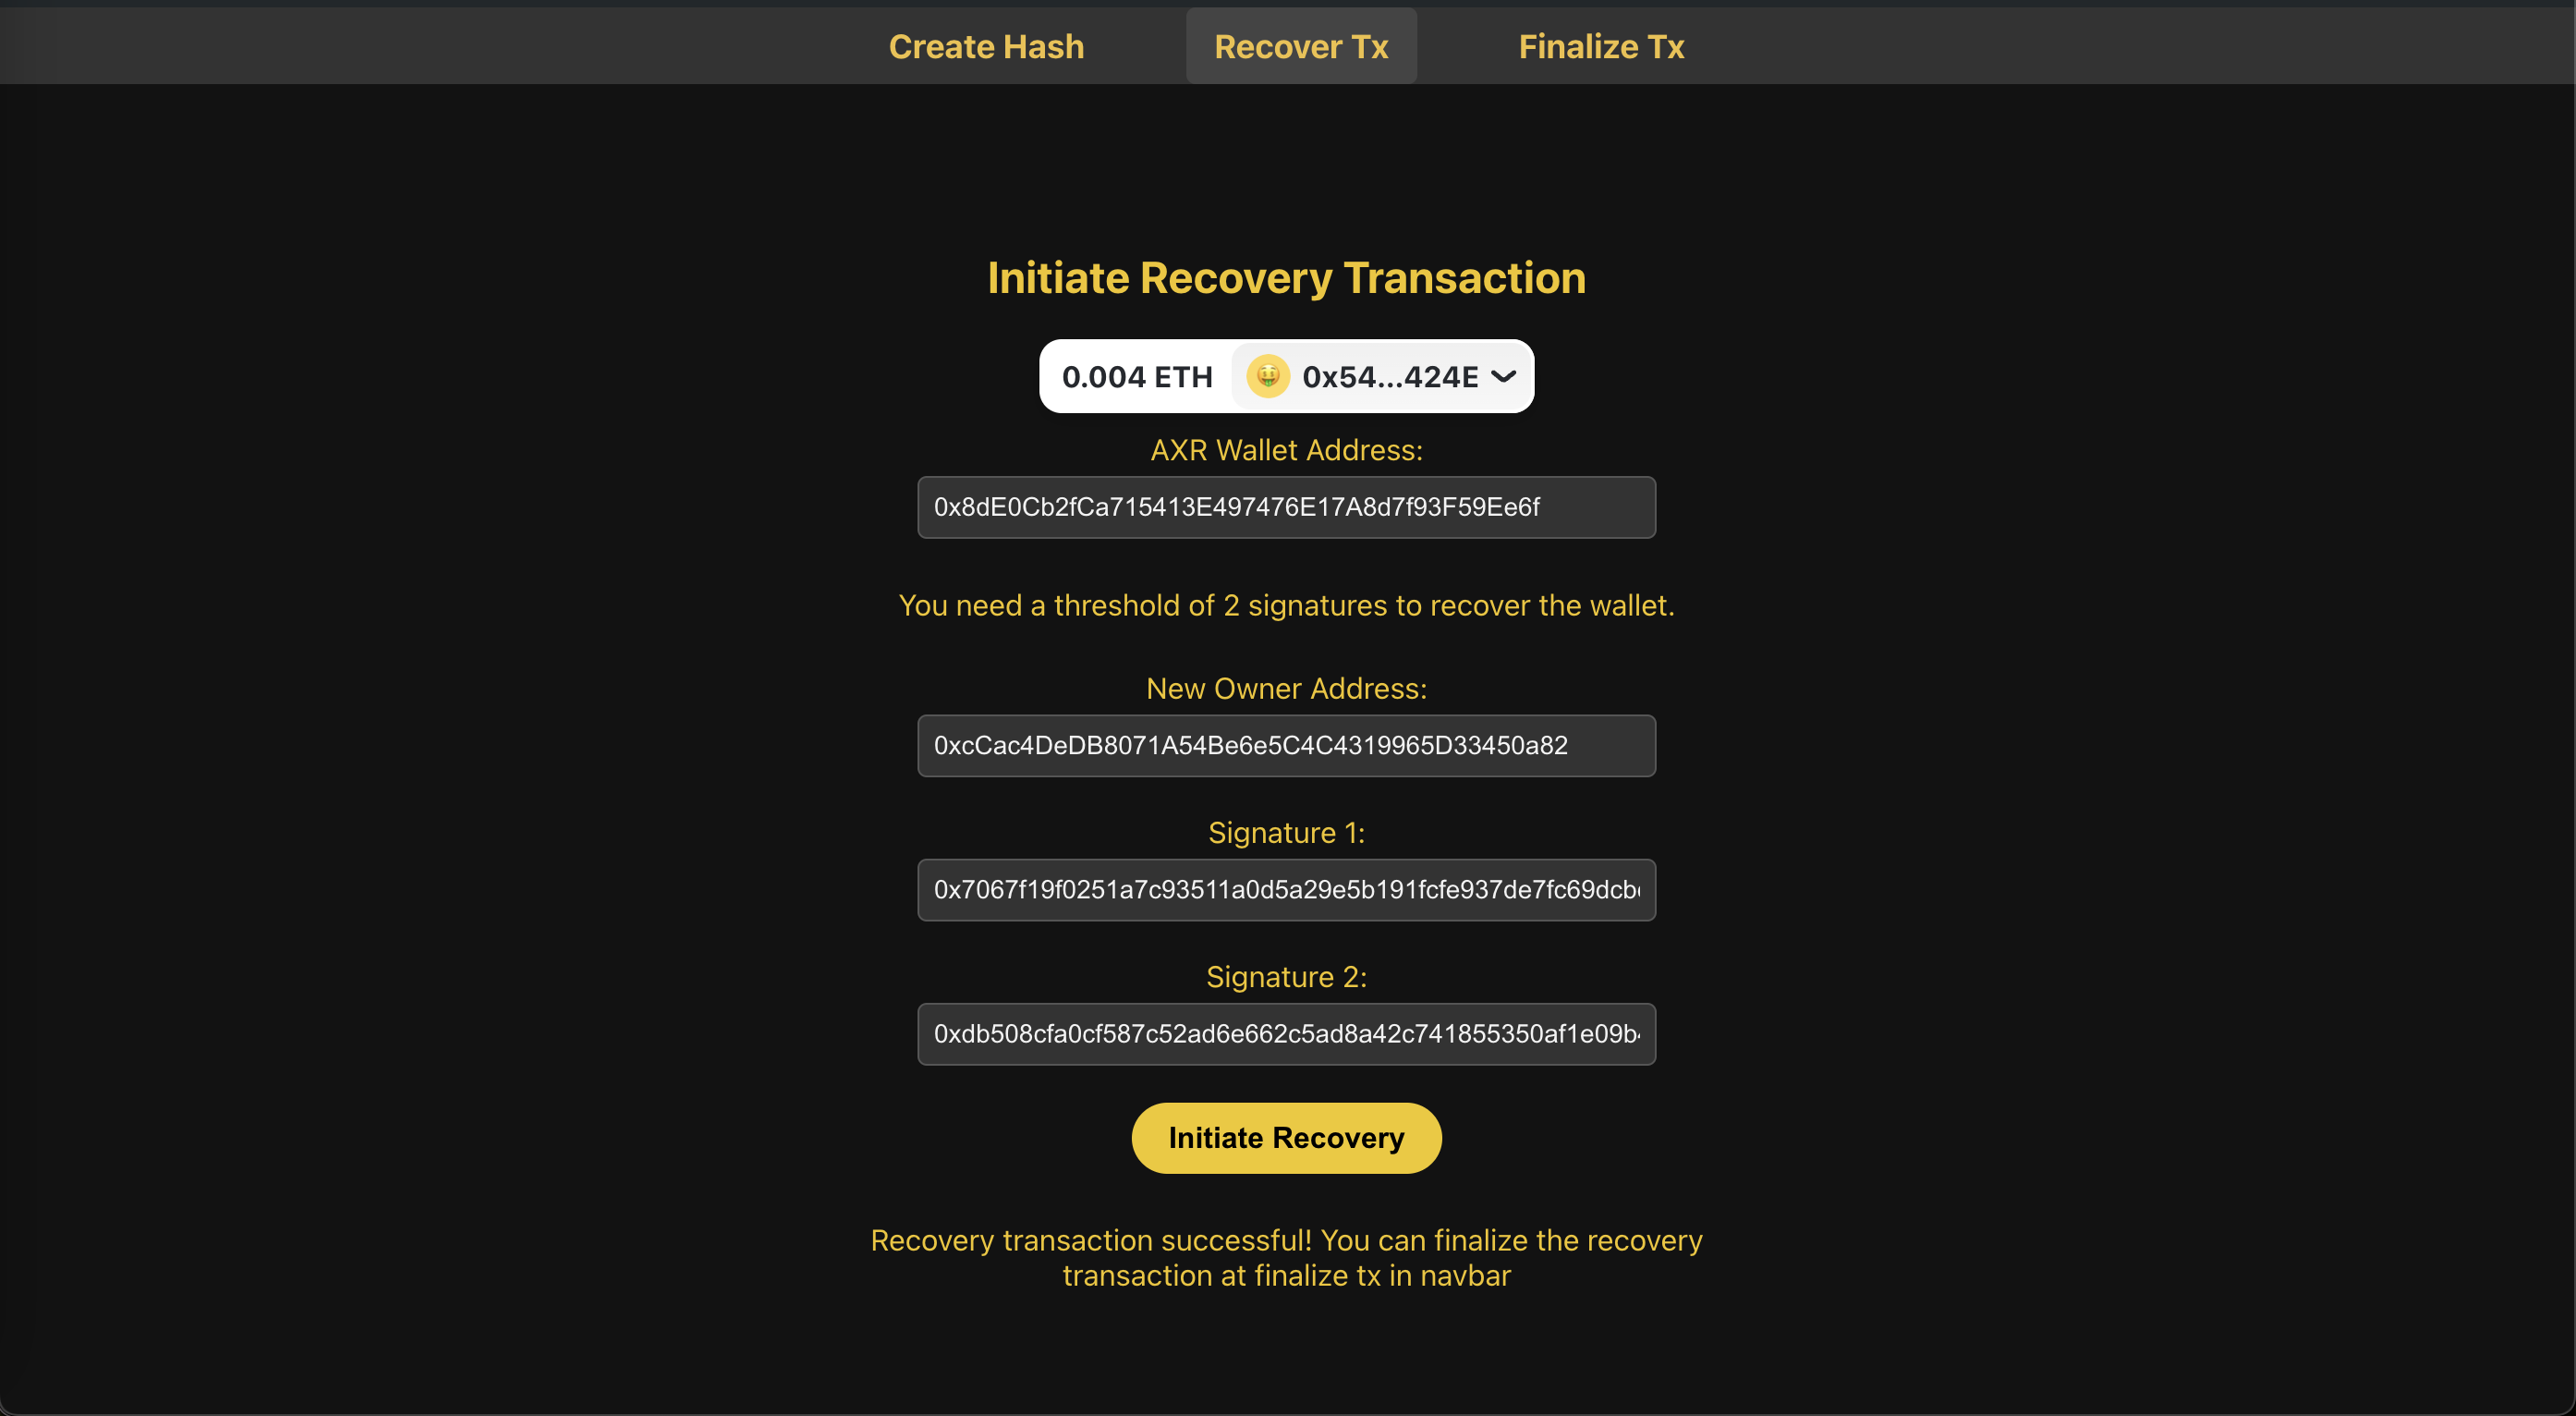
Step 3: Initiate Recovery Transaction
Once you've collected the required number of guardian signatures:
- Go to the "Recover Tx" section.
- Input your AXR Wallet address and the new owner address again.
- Enter the signatures collected from your guardians.
- Click "Initiate Recovery" to start the recovery process.
Finalizing Recovery
After initiating recovery, there's a mandatory waiting period before you can finalize the transaction. This delay serves as an additional security measure.
Step 1: Access Finalize Transaction Interface��
Navigate to the "Finalize Tx" section of the recovery interface.
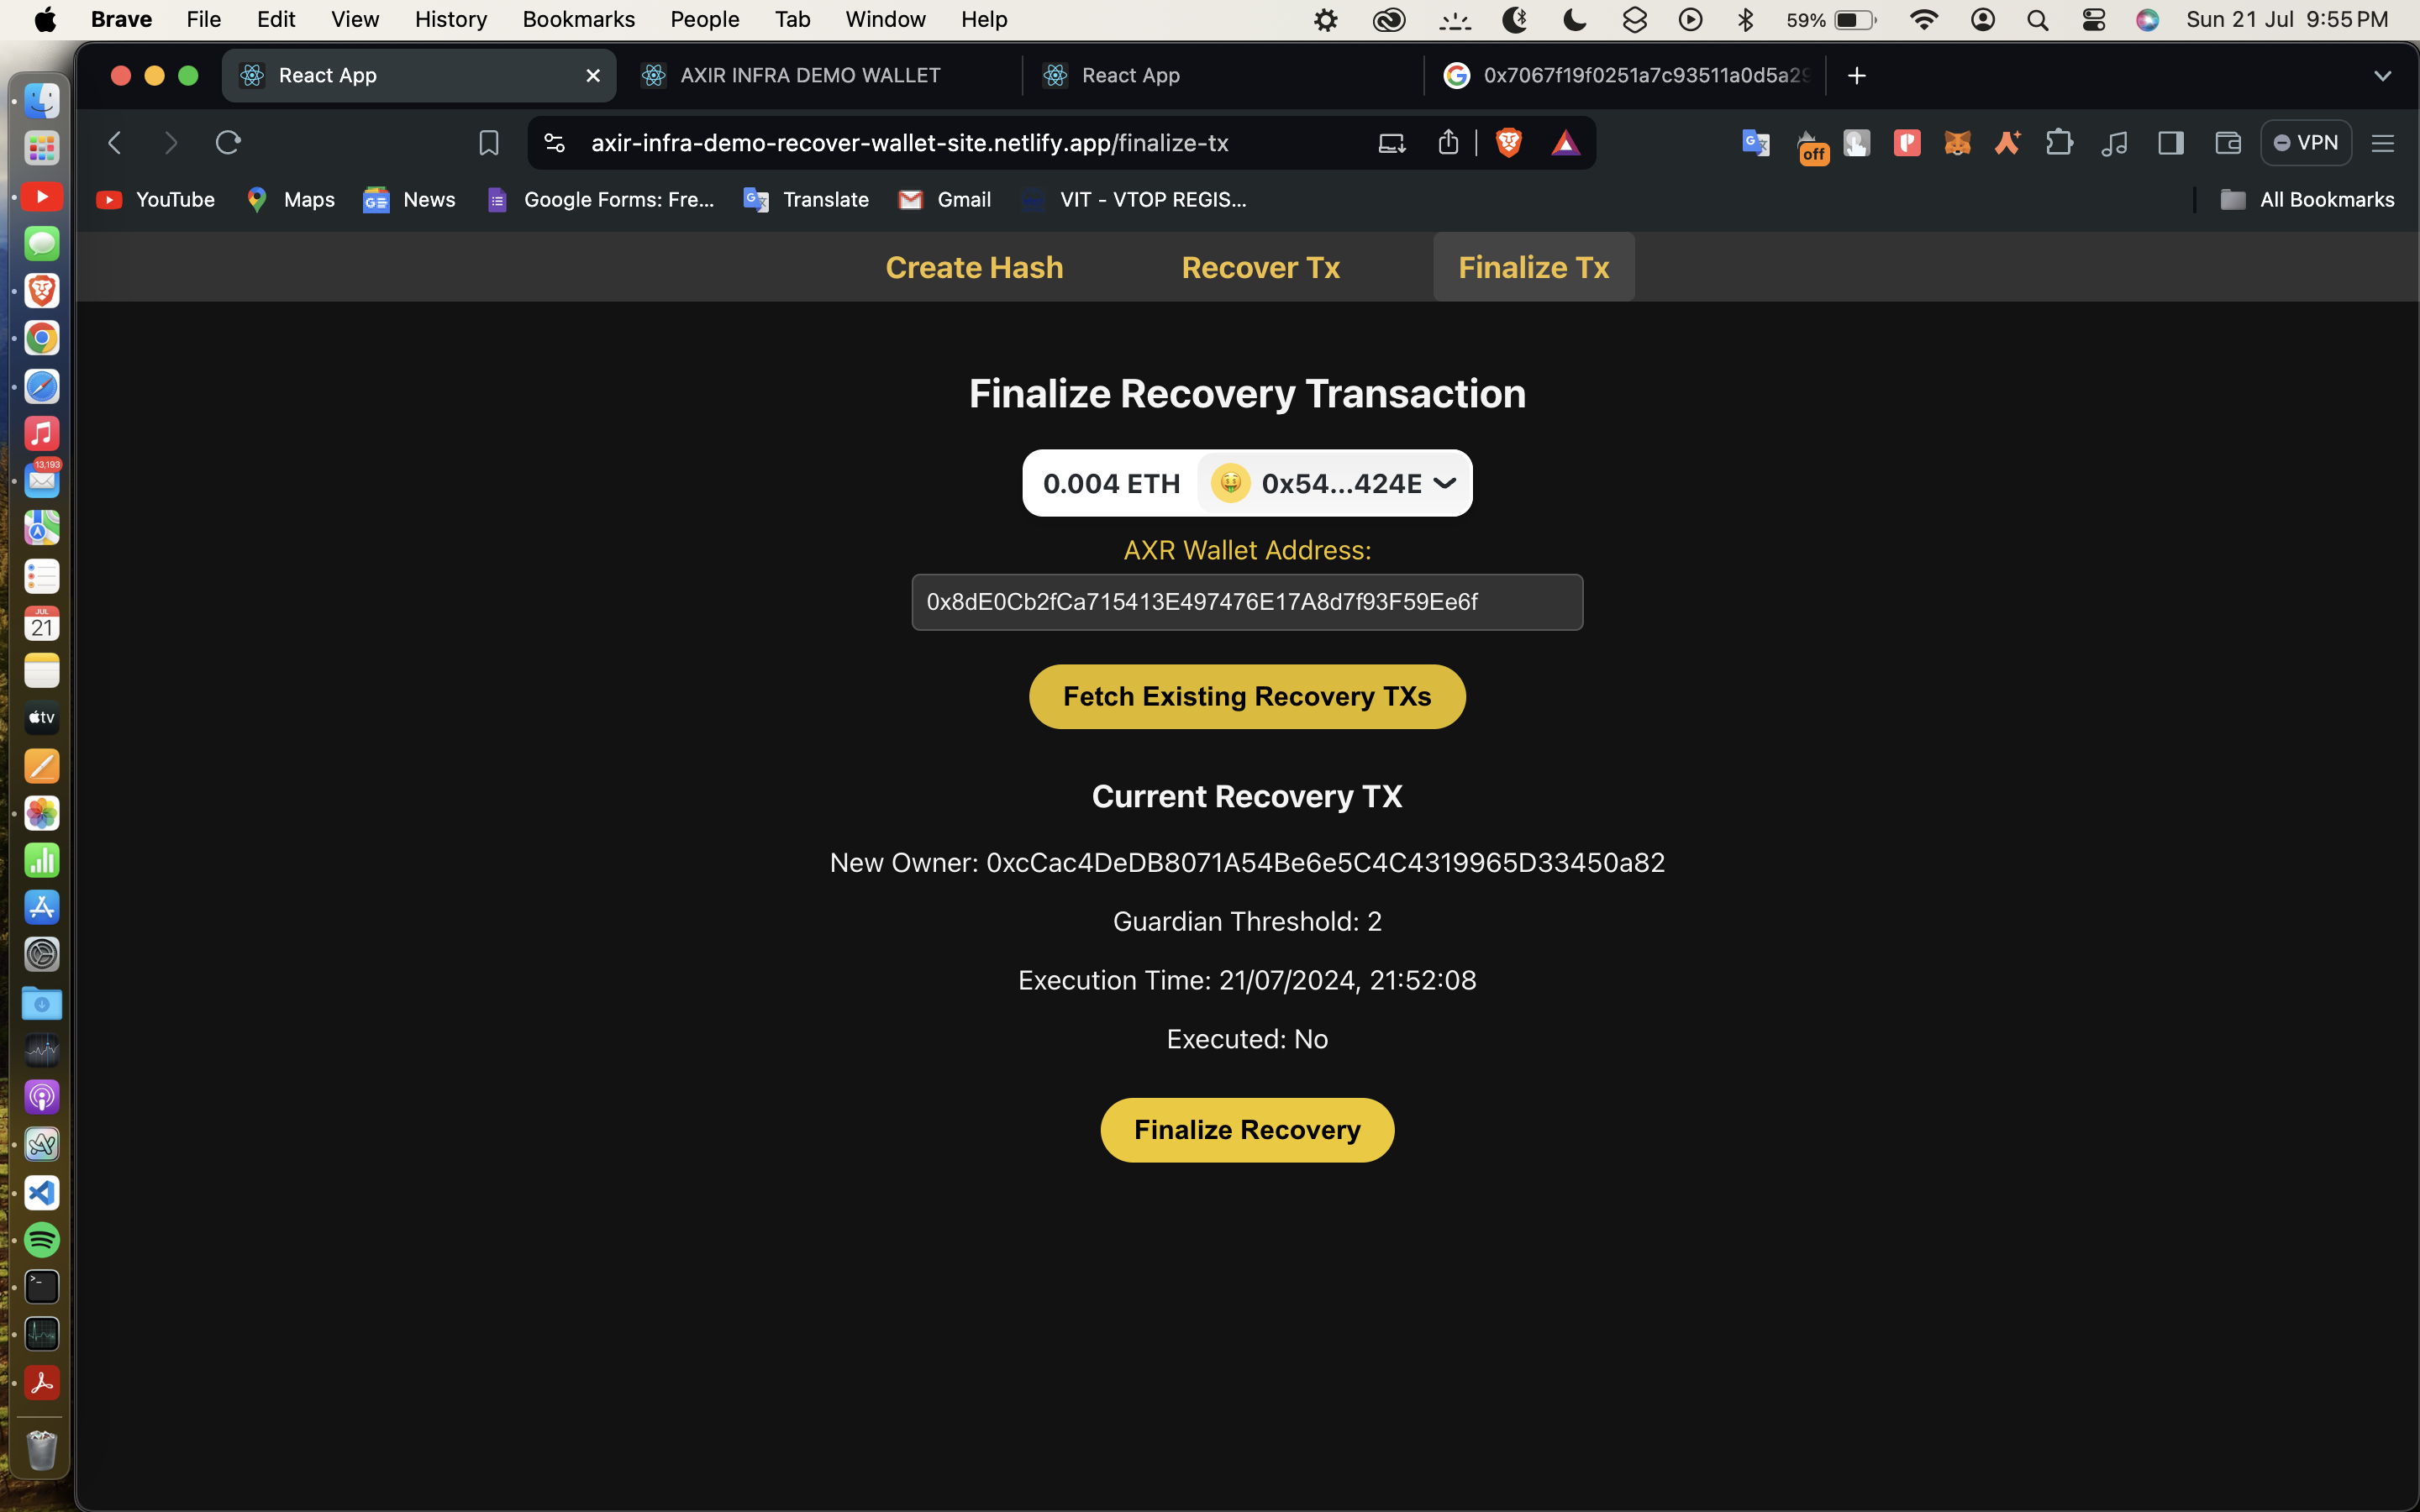
Step 2: Fetch Existing Recovery Transactions
- Enter your AXR Wallet address.
- Click "Fetch Existing Recovery TXs" to see any pending recovery transactions.
Step 3: Review and Wait
You'll see details about the current recovery transaction, including:
- The new owner address
- Guardian threshold
- Execution time
- Whether the transaction has been executed
The interface will show you how long you need to wait before finalizing the recovery. In this demo, the waiting period is set to 5 minutes, but this can be customized for different security needs.
Step 4: Finalize Recovery
Once the waiting period has passed:
- The "Finalize Recovery" button will become active.
- Click this button to complete the recovery process.
- Confirm the transaction in your wallet.
After successful finalization, the ownership of the AXR Wallet will be transferred to the new address you specified.
Remember, the social recovery feature is a powerful tool for protecting your assets. Always keep your guardian list up to date and choose your guardians wisely. Regular reviews of your recovery settings can ensure you're always prepared for unexpected events.